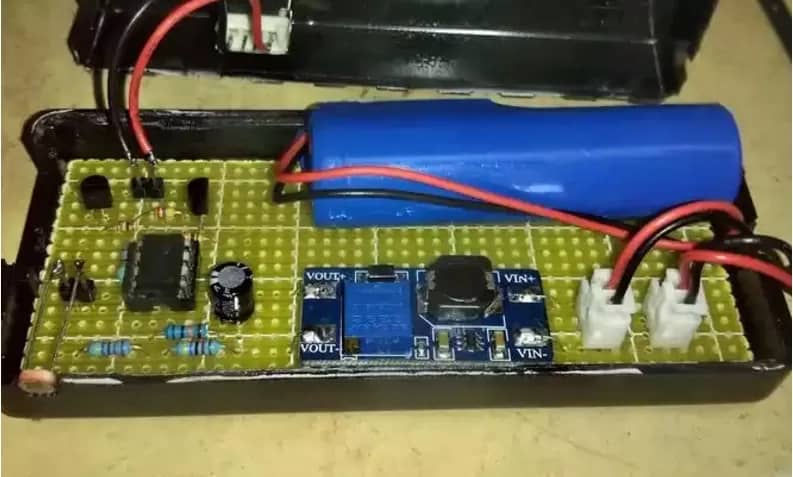
How to make a solar powered light?
Prepare Materials You Need:
1.Solar Panel:
Select a solar panel that suits your power requirements. The power output of solar panels is usually measured in watts. For a simple outdoor light, a small 1 – 5 – watt solar panel might be sufficient. You can find these in electronics stores or online. Make sure it comes with the appropriate wires for connection.
2.Battery:
A rechargeable battery is essential to store the energy collected by the solar panel. Commonly used batteries are 12V lead – acid batteries or lithium – ion batteries. The capacity of the battery (measured in amp – hours, Ah) determines how long the light can operate when the sun isn’t shining. For example, a 7Ah battery can power a small light for several hours depending on the power consumption of the light.
3.LED Lights:
LEDs (Light – Emitting Diodes) are energy – efficient light sources. You can choose white LEDs for a bright, clear light or colored LEDs for decorative purposes. The number of LEDs you use will depend on the brightness you desire. LEDs come in different wattages and lumen outputs. For a basic solar – powered light, a string of 3 – 5 LEDs might be enough.
4.Charge Controller:
This device regulates the charging of the battery from the solar panel and prevents overcharging. It’s a crucial component to ensure the longevity of the battery. There are simple, inexpensive charge controllers available that are designed for small – scale solar applications.
5.Resistors (if needed):
If the voltage of the battery or solar panel doesn’t match the requirements of the LEDs, you may need to use resistors to adjust the current and voltage. The value of the resistor can be calculated using Ohm’s law, but for many pre – made LED kits, the necessary resistors are often included.
6.Switch:
A simple on – off switch allows you to control the light. You can use a toggle switch, a push – button switch, or a touch – sensitive switch depending on your design preference.
7.Enclosure or Housing:
You’ll need something to hold all the components together. This could be a plastic or metal box, a DIY wooden frame, or even a repurposed container. The enclosure should protect the components from the elements if the light is going to be used outdoors.
8.Wires and Connectors:
You’ll need wires to connect the solar panel, battery, LEDs, charge controller, and switch. Use wires with the appropriate gauge (thickness) to handle the current without overheating. Connectors such as soldering lugs, terminal blocks, or plug – and – play connectors can make the wiring process easier.el: Select a solar panel that suits your power requirements. The power output of solar panels is usually measured in watts. For a simple outdoor light, a small 1 – 5 – watt solar panel might be sufficient. You can find these in electronics stores or online. Make sure it comes with the appropriate wires for connection.
Steps to Build the Solar – Powered Light:
I.Prepare the Components
1.Mount the solar panel in a location where it will receive maximum sunlight. This could be on a roof, a pole, or a south – facing wall (in the northern hemisphere). Make sure it’s securely attached and angled to capture the sun’s rays efficiently.
2.If your battery requires any initial setup, such as adding electrolyte (for lead – acid batteries), follow the manufacturer’s instructions.
3.Test the LEDs to make sure they work. Connect them briefly to a suitable power source (like a small battery) to check for any defective LEDs.
II.Connect the Charge Controller
1.Connect the positive wire from the solar panel to the positive input of the charge controller. Usually, the wires are color – coded, with red for positive and black for negative.
2.Connect the negative wire from the solar panel to the negative input of the charge controller.
3.Connect the positive output of the charge controller to the positive terminal of the battery.
4.Connect the negative output of the charge controller to the negative terminal of the battery.
III.Connect the LEDs and Switch
1.If you’re using a string of LEDs, they may already be connected in series or parallel. If not, you’ll need to connect them according to the voltage and current requirements. In a simple series connection, the positive terminal of the first LED is connected to the power source (battery), the negative terminal of the first LED is connected to the positive terminal of the second LED, and so on. The negative terminal of the last LED is then connected to the negative of the power source.
2.Insert the switch in the positive wire between the battery and the LEDs. This way, you can turn the light on and off.
IV. Test and Adjust
1.Cover the solar panel to simulate nighttime and turn on the switch. The LEDs should light up. If they don’t, check the connections, especially the polarity (positive and negative).
2.Measure the voltage and current at various points in the circuit using a multimeter. Make sure the battery is charging correctly during the day and that the LEDs are receiving the appropriate power. If the brightness of the LEDs is too high or too low, you may need to adjust the number of LEDs or the resistance in the circuit.
V. Enclose the Components
1.Once everything is working properly, place all the components (battery, charge controller, LEDs, and switch) inside the enclosure. Make sure there’s enough space for air circulation to prevent overheating, especially for the battery.
2.Drill holes in the enclosure for the wires to pass through. Seal the holes to prevent water from getting in if the light is outdoors.
3.Mount the enclosure in the desired location. If it’s a portable SOLAR light, you can attach a handle or make it easy to carry.
By following these steps, you can create a simple and functional solar – powered light that can provide illumination using the energy from the sun.